Final Plans for Town Meeting
Our Final Plans(PDF) are coming together for the meeting at the Springdale Town Hall meeting in February. This is close to the real deal, fans ! Here is a screenshot for those impatient or who do not have Adobe acrobat:
Life and Thoughts in Zion Canyon
Our Final Plans(PDF) are coming together for the meeting at the Springdale Town Hall meeting in February. This is close to the real deal, fans ! Here is a screenshot for those impatient or who do not have Adobe acrobat:
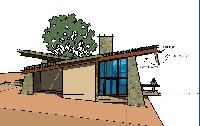
Based on our sketches, here is what Ray has come up with:
After our Thanksgiving dinner, we re-thunk our plans and realized we like the earlier
plans a lot more. So we spent some time working out what we liked about the later plans
and tried to integrate them into the earlier (2.0) plan. Here is what we came up with:
NB: If you notice some things changed from the last time you looked, its because I upgraded
my home system from linux Fedora Core 2 to Core 3 this weekend (12/4/04), and in the process
blew away some data files. It happens. This is from a backup from a few days ago.
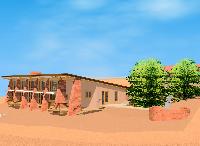
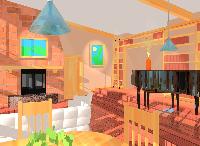
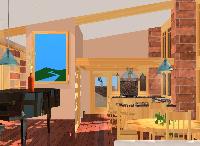
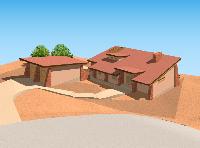
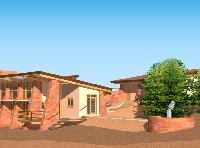
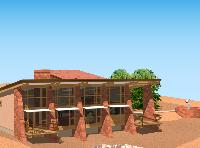
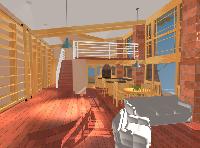
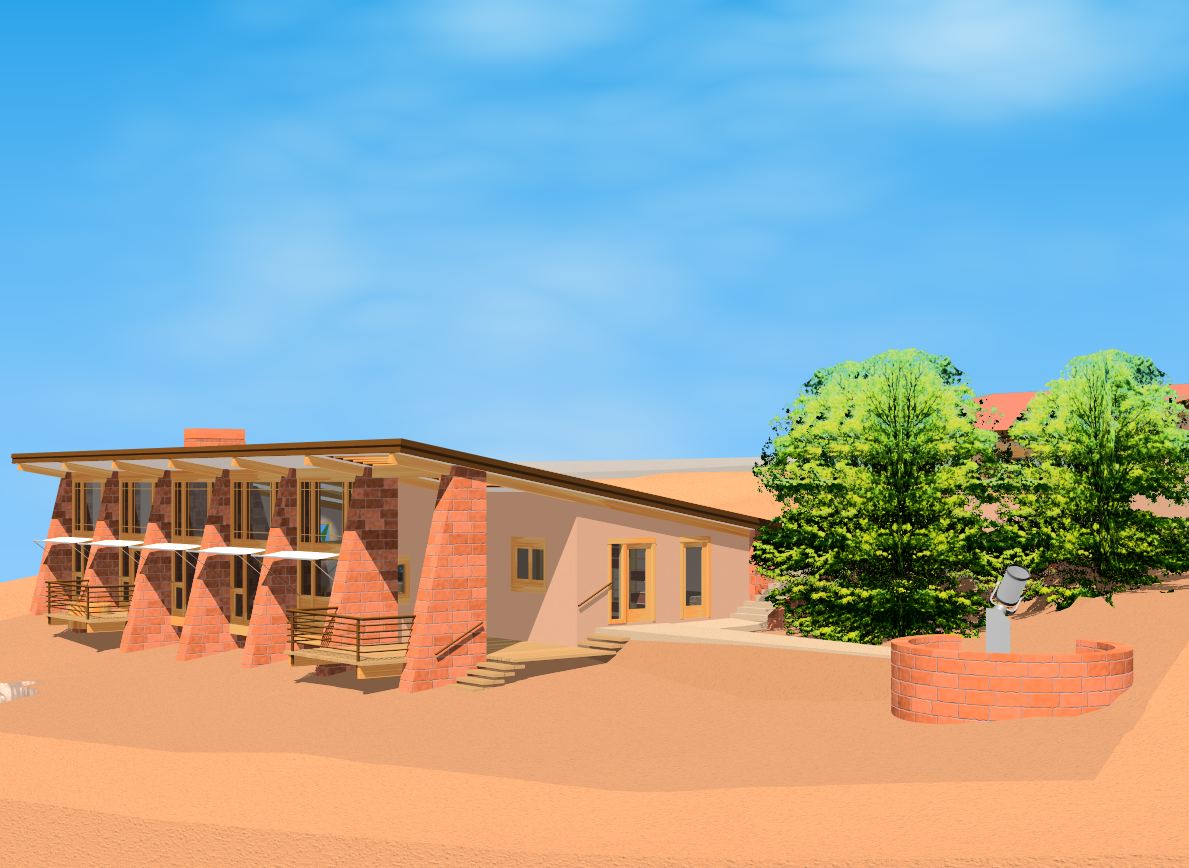
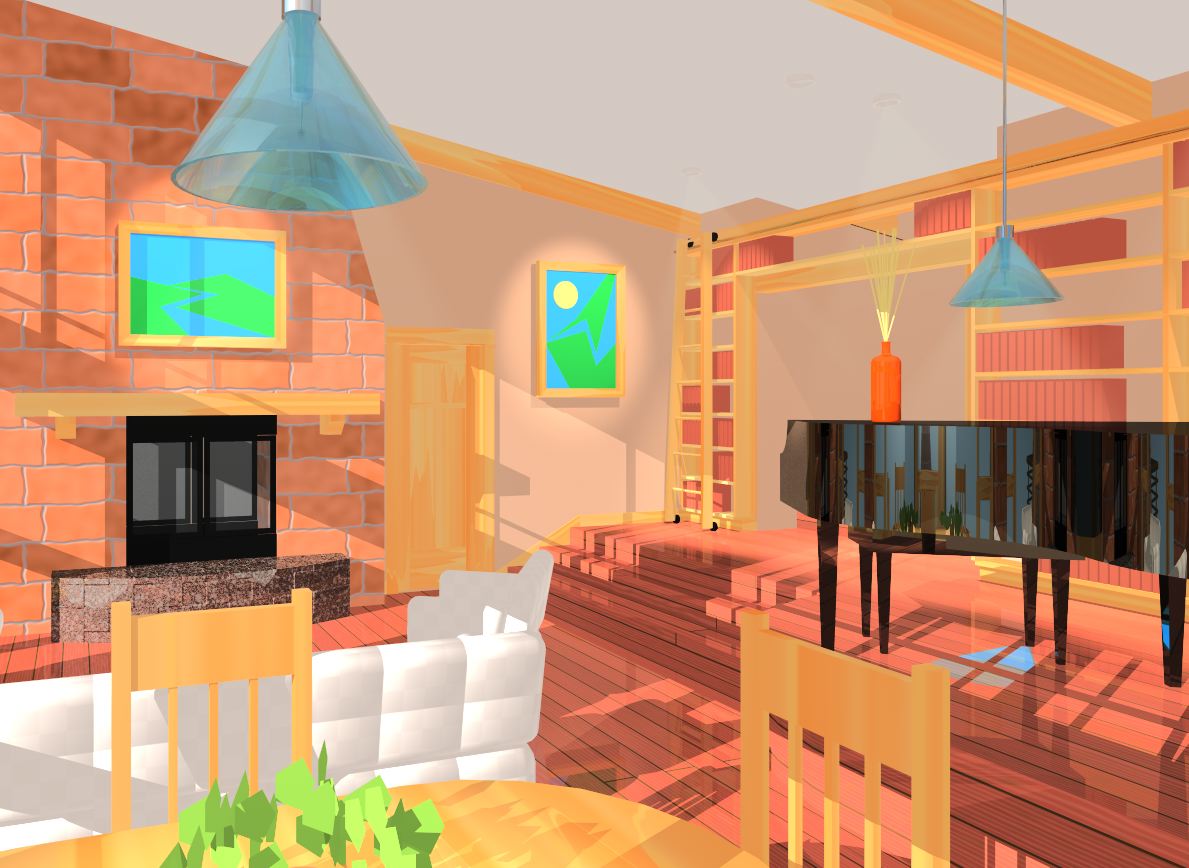
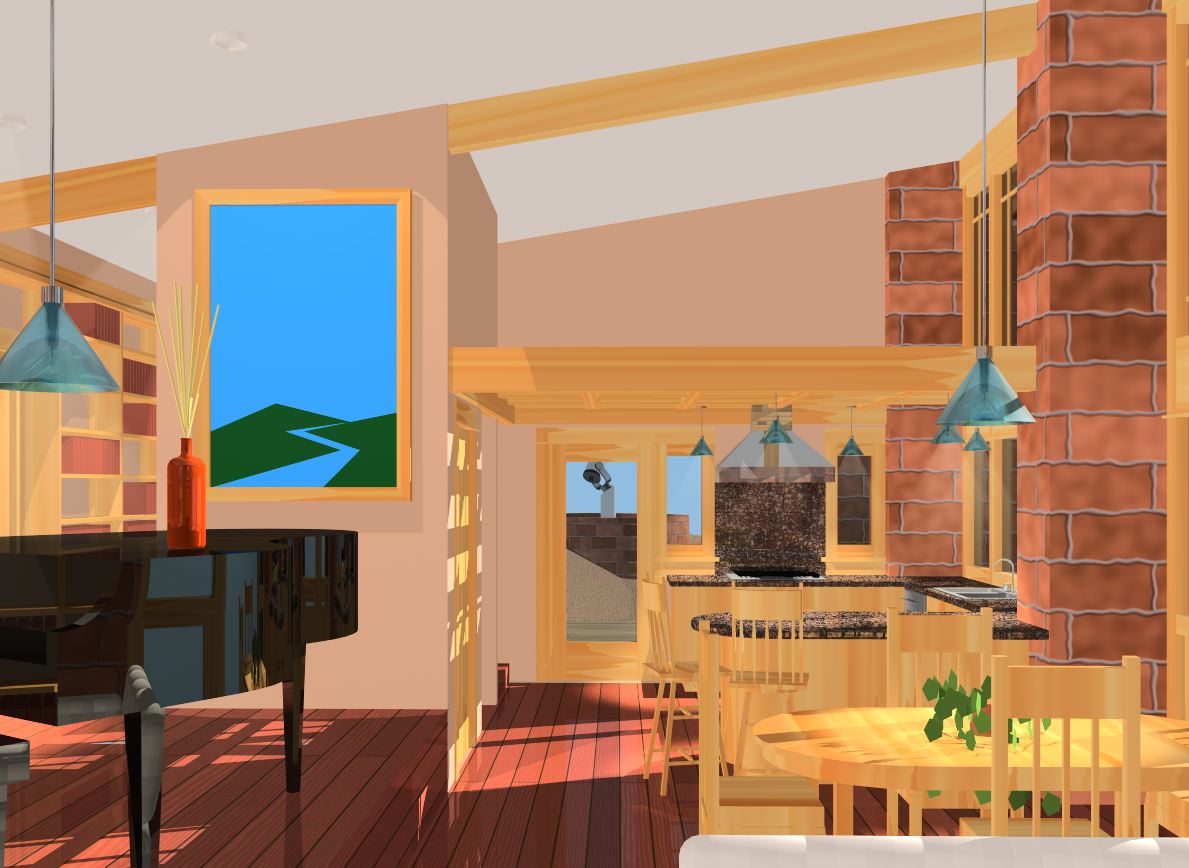
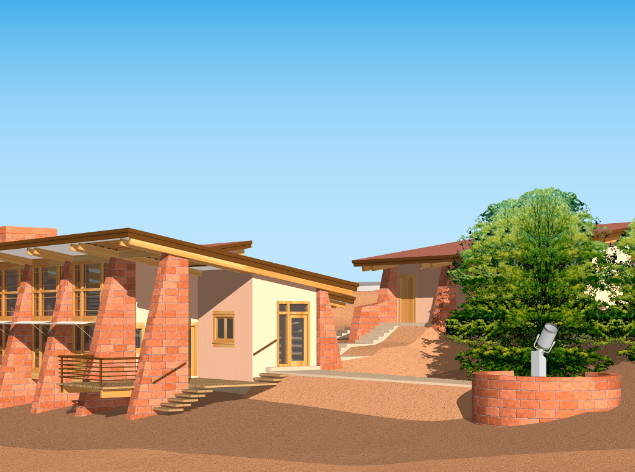
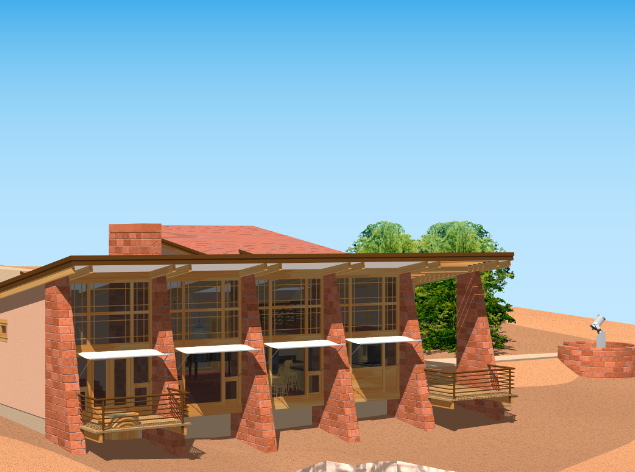
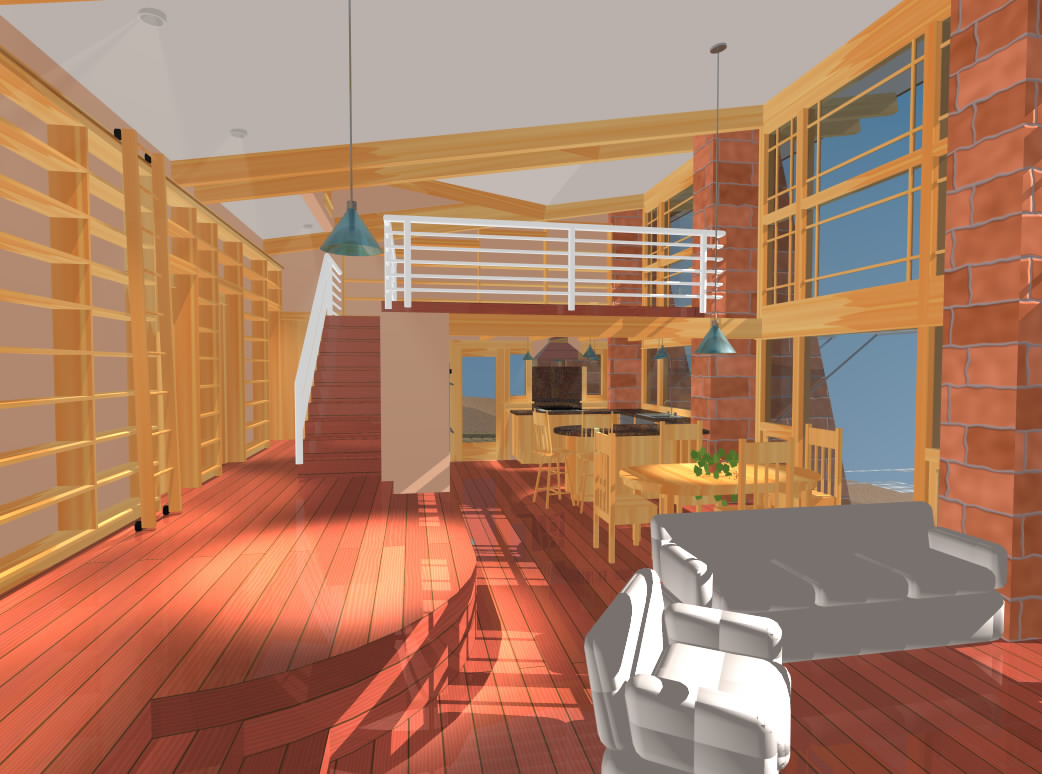
Ray has been able to move a few things around and clean up the design
a lot. Here is the floorplan, and here are some new 3d views of this plan:
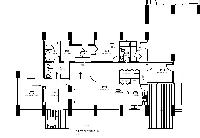
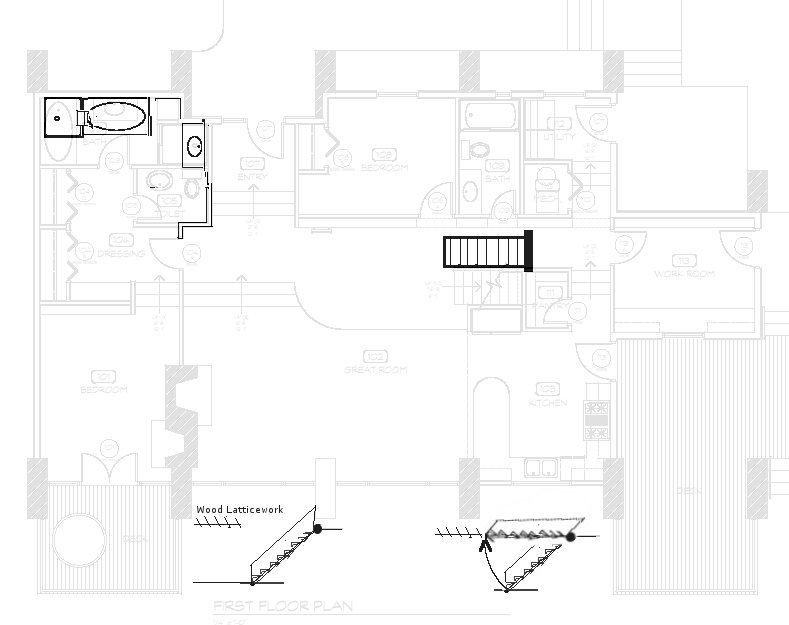
Here are snapshots of the latest (3.4 by my numbering schema) version of the
Floorplan and the Site Plan (how the house is sited on the property):
You can also download the full pdf version of the floorplan and the
siteplan. Enjoy!
Our architect Ray has been busy, and has come up with new versions
8, 9 and 10 of our floorplan, accomodating the Springdale 1-floor
limitation:
Turns out that the Springdale folks have changed the rules about
“high impact” lots in the town, and our site now falls under that
definition. This requires that our house be no more than 20 feet
high at any point, and that is two feet over our current plan.
Looks like we will have to move the loft back down to the ground
floor and think a lot more about how to make this all work.
Bummer.
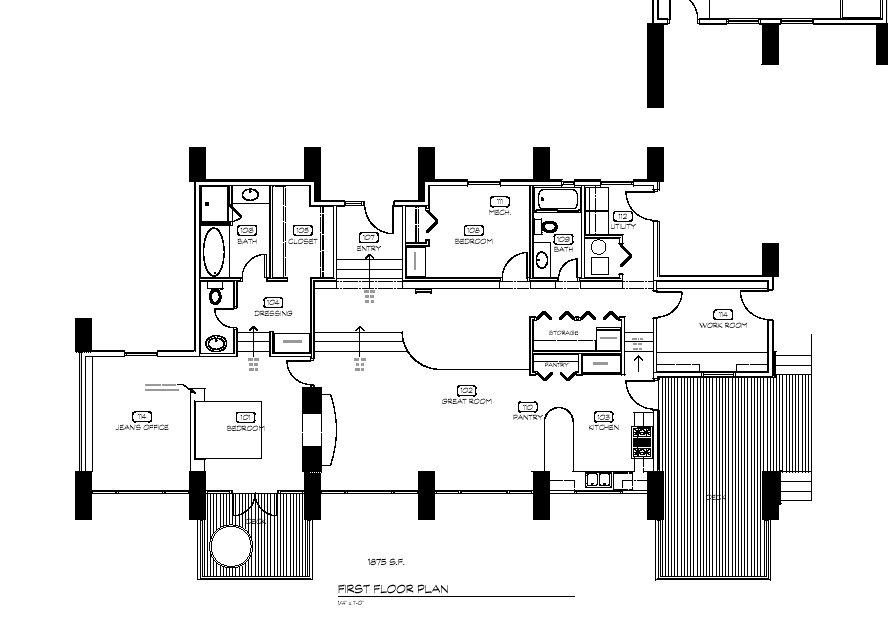
Here is the latest (3.0 if anyone’s counting) version of the floorplan
(click to enlarge):
That is just a screen-capture. Here is the full PDF formatted plan. Note the Gigi Loft, and the ladder for those hard-to-reach books way up there on the shelves (the ladder is only obvious in the pdf version).
Okay, so the things we want to change with this version are…
Hmm.
Pretty much nothing. This is very cool.
…okay I guess we’re done then.
Amazing how much this stayed in the spirit of our Version Zero bubble diagram.
Here are a few sketches we’ve sent Ray on the Loft, the bedroom fireplace,
and so on. This first one is an overlay of the floorplan mods:
This is still not quite right, but a lot closer. The north wall of the bedroom needs to be moved up to
increase the size of the bedroom, and we want to re-open the pathway through the washer / pantry
area to have a direct route to the kitchen. Also, Gigi suggested that if we place the secondary entrance
over on the eastern side of the house, that opens up the north corner of the house as a good place to
put the water heater room, currently next to the wash area. This would then allow the pantry area to
be increased.
This second one is a view of the loft area, together with an elevation view:
I’m not sure about this either. I think actually the post should go on the left side of the kitchen
entryway to hold up that side of the walkway across to the loft. Anyway, we’ll see what Ray does
with that.
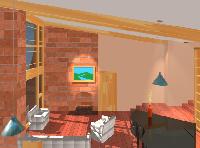
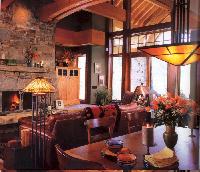
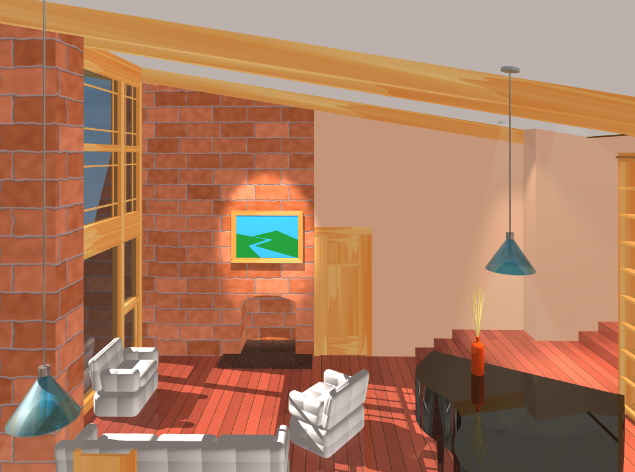
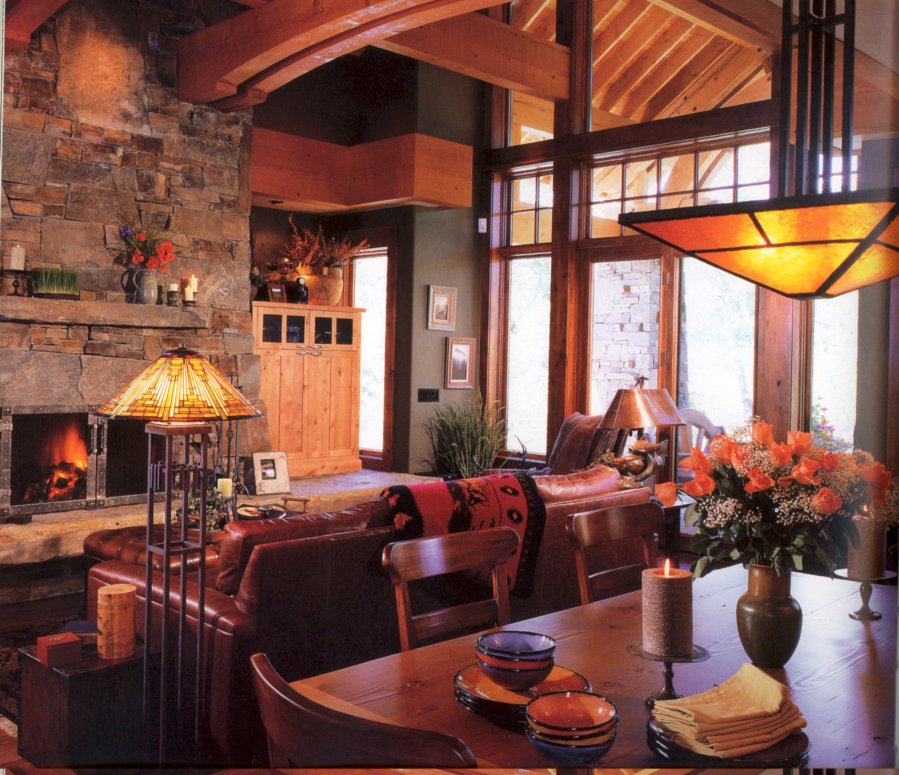
We’ve put together a gallery of arts and crafts cabin interiors that we like.
Here’s an example of one of them:
Here is a sketch of possible changes (see below)
We are looking at the “Second Try” layout and trying to figure out
how to address some of the things we are still not settled on. In
some ways we like some of the “First Try” features better, but
also know that won’t work. We’ve been looking at some designs of
“cabin” interiors that we like and have come up with some general
goals. Above is a vague sketch of how it should go, but we do not
have to go with it if someone comes up with something that works or
feels better.
Goals for next try:
1. Reduce Footprint to 1800
2. Create fireplace for master bedroom, possibly by
rotating bedroom down into Jean’s Room and sharing
same FP as great room from opposite side. Bedroom
will now open right out onto main deck, and jacuzzi
should be moved over, as the two leftmost columns
will now disappear.
3. Move sinks and kitchen down to current location
of nook. (the range / counter will have to be rotated
90 degrees to fit).
4. Move Jean’s space to a loft over Kitchen
5. Move Utility room down to former location of
kitchen.
6. Change “Guest” room to “Niles Study”, and move it
south 12 feet. It can be made smaller, 10′ square
or so, windows facing south. Place an exit out the
east side of study, with a ramp to allow rolling the telescope
out to pad.
7. Take former space occupied by Utility room and
turn it into (smaller) guest room. The bathroom does
not necessarily have to be attached to it, but if you
flip the current bathroom and the secondary entrance
hallway it should work.
Only 7 changes! That’s a lot better than the first time around. There is
hope yet…
The word going around is, my Dad’s Aunt Eunice has finally found some
prime samples of “Ritter Block”, which is a sort of concrete block that was
invented by my great-grandfather, George Ritter. George was in the concrete
and marble/tile business in Pinckneyville, Illinois, and his “Ritter Block” was
used in many buildings throughout that part of Illinois.
The plot had been hatched in my mind some time ago that a novel tribute to
my inventive ancestor would be to obtain one of his blocks and use it as a
cornerstone for the house we are building.
Here is an old picture of George Ritter with one of his other inventions, a
new jack for automobiles:
Slice-o-Life Department:
It was not my most ambitious meal, but I was really happy with the
way the sauce came out. After sauteing the onions and mushrooms
in butter, deglazing with white wine, then adding the fresh chopped
tarragon and vegetable stock, this formed the base of a subtle but aromatic
cream sauce for the pan-seared salmon steaks, resting on a bed of
mushroom risotto (with a little extra cognac to kick it up a notch).
And Gigi was just sitting there, absently poking at it with her fork.
This was right out of a gender-bent 50’s melodrama. I was ready to stand up, rip
the metaphorical apron off and plaintively wail in a fake Cary Grant accent,
“dahling, where has the magic gone ?”
It turns out that
Good news all around. I had not known about issue #1, but I thought I was the only one waking
up at 3am with brooding thoughts about loft design, light, stone vs. wood, and
soils compaction tests.
The only trouble is, her ideas mean going back a few steps and redoing part of the process I
thought we had finished with. Frustrating. But I have to admit, they open up ways to make
the overall plan cleaner and simpler, with a smaller footprint, but more interesting internal
design and structure that comes closer to what we had in mind originally. Stay tuned.
Next time, I’ll be sure to get the fish filets without the bones in them.
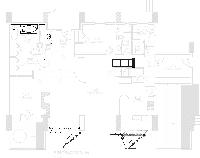
Here is a snapshot of our latest floorplan (click to enlarge):
You can also download the scalable PDF version here.
You will notice that most of our change requests were implemented. In addition, the
observatory was redesigned as a circular platform, and moved away from the main house to
avoid the line-of-sight interference and thermal effects that interfere with astro-photography.
When the telescope is not up, it can double as a picnic area or gazebo.
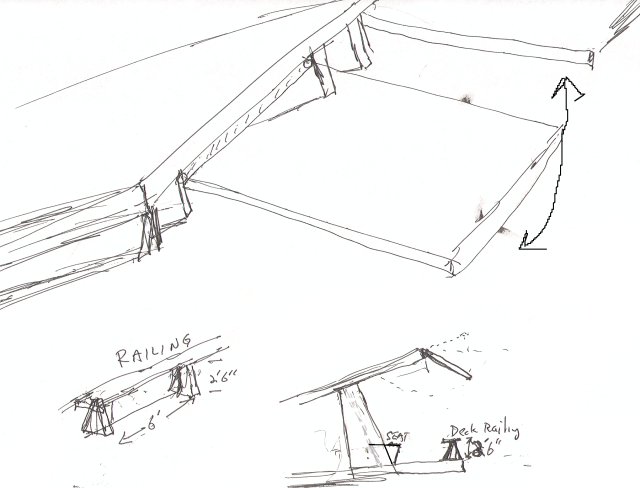
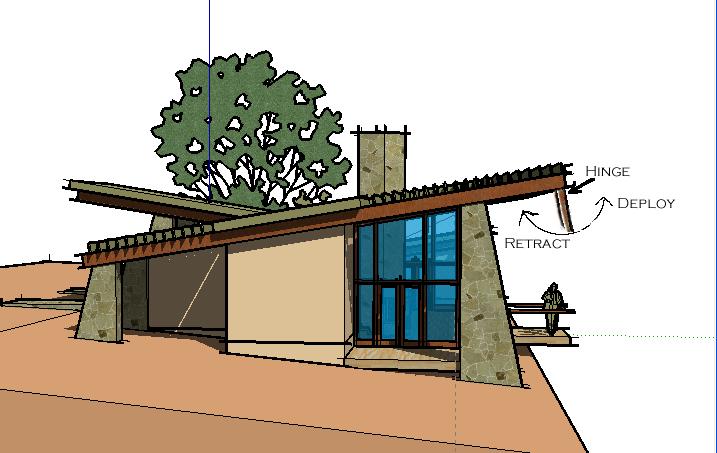
Here is a sketch of one possible way to implement the leading edge “brim” of the
roof that can be deployed or retracted depending on the amount of shade
and the angle of the sun:
There is also a sketch of some build-in seats that could be put on the inside edges of
some of the columns on the deck. The railing can have small concrete posts that
match the columns in shape, though perhaps flipped or made symmetrical. I see these
railings as being low, about 2-3 feet.
Our friend Andy gave us a brochure from a window company called Eagle. These arts-and-crafts style
windows look like they may work for us (click to enlarge):
The changes to the 1.0 floorplan are in dark overlay over the original diagram:
May be described as follows:
1. Move tall windows out halfway along columns, also making them
slant parallel to the outside slant of the column. This
creates 3′ recessed areas inside for reading nooks,
dining nooks, etc. If slanting them is structurally difficult
or expensive, leave vertical but push out the top of window to the
very outside edge of top of column. It also allows for the bottom
portion of the wall to be material other than glass.
2. expand deck along entire south-facing side. Move jacuzzi from
fenced patio to southwest corner of deck.
3. Move the doors leading to outside deck over to the next set of
windows on the right (east).
4. Shorten Guest bedroom to 12′ square and move up (north)
flush with front. Entrance to it will now be on the
northwest corner.
5. Put windows on both south and east facing walls of guest room.
6. Move the guest bathroom down (south) approx. 3-4 feet, forming
a small hallway leading to the guest room entrance. Flip the bathroom
floorplan vertically, and place the bathroom entrance so that
it is in the little hallway connecting to the guest room.
7. Move french doors on south-eastern wall down approx 3 feet,
and extend wall north to intersect the bathroom.
8. Place dual sink/counter against this new eastern wall, and
place window over the pair of sinks.
9. Orient Fireplace so that it is facing south-east, diagonally
into great room.
10. flip the range/counter horizontally, move it towards the
eastern side, and bend the curved edge more towards 60 degrees.
Curve the stairs up 30 degrees to meet the end at right angles.
11. Eliminate central sink/storage island.
12. Eliminate entryway coat-closet. We will never use them. Use
space to fill out utility room.
13. Push south wall of utility room 3 feet further south.
14. Move fridge to South-eastern corner of utility room, facing
into kitchen.
15. Recess the eastern wall of Utility room, to allow placement
of pantry shelves into wall along eastern side of wall.
16. Eliminate closet next to the secondary entrance. leave open
for hanging boots, hiking poles etc.
17. Move Jean’s desk over to recessed south window, facing view.
18. Move northeastern column up, aligned with the others in front.
19. Place window on western wall of master bedroom.
20. Move jacuzzi to south-western corner of deck.
21. Reshape master bathroom from 12×12 to an area shaped 10 x 14, removing 2′ of
space from north front and moving it to the western side.
Remove fenced patio and door in bathroom leading to it.
Refer to overlay showing how bathroom is now split into
a separate shower/bath/sink, and toilet-sink combination,
with a joined walk-in closet.
22. Remove bidet and one of the sinks in master bathroom. Use
the extra space to form a walk-in closet on the eastern edge
of bathroom space.
23. Remove closet from master bedroom, and move eastern wall of
master bedroom so that it is flush with the current location
of the bedroom doorway.
24. Move observatory slightly north so that the roof may slide
into (now larger) courtyard, without colliding with the stone
columns. Note: Observatory may have to be taller than currently,
so that the house roofline does not block the western view of
scope.
My first comments on the 1.0 design as shown in the 3D CAD view are
One possibility that has occurred to me for item #3 is to add a set of hinged
“eaves” to the upward-sloping roof, that when deployed drop down from the
roof edge, parallel to the outside column line. Here is a sketch of the idea:
Another idea for #3 that I’m no longer enthusiastic about was to add a
downward sloping roof on part of the house, forming a sort of clerestory
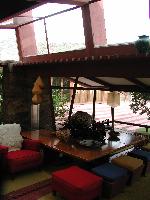
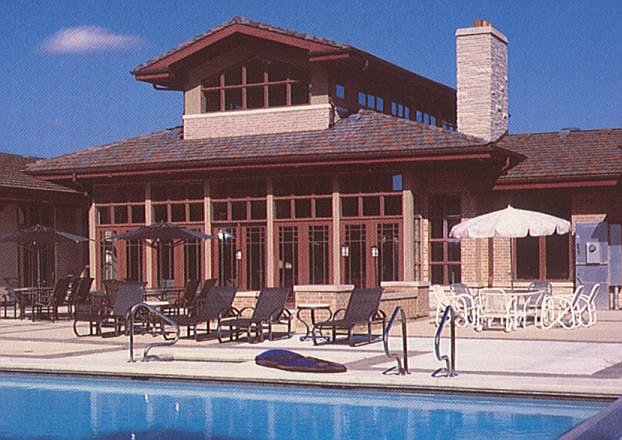
window in between. Here is an example from an interior of
Frank Lloyd Wright’s Taliesin West House
(taken on the roadtrip following our wedding in Sedona):
Note the tilting window and that the downward-sloping roof forms a space
for a clerestory window at the top. Kind of a neat effect, I think. You can
even see a strong resemblance to the stone column of the Taliesin room
and our columns. If you were to move the lower roof up about a foot or two
it would still provide a nice framing for the moutain views, but still creating
a much more sheltered feel for the deck.
I don’t like this approach as much as the “deployable eave” concept, because
it destroys Ray’s roof line, which I like, and requires a lot more engineering
to support that big second roof. The eaves idea doesn’t tweak the structure
at all, and is simple.


